 | Hello Guest - Sign In or New Account |
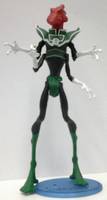
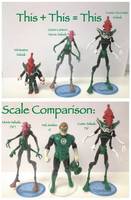
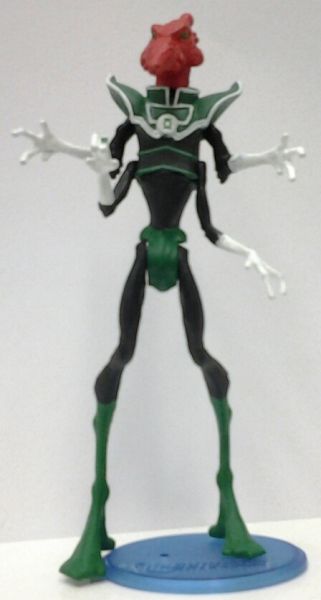
Having collected virtually every Green Lantern character available in the roughly 4.5 inch scale, I had very mixed feelings upon finally picking up the Salaak figure Mattel had produced. On one hand it was nice finally having access to figures of other Green Lanterns; for decades Hal Jordan had been the only one available. On the other hand, the Salaak figure finally released to the toy-buying public didn't look very accurate. One of the problems with the Salaak figure put out by Mattel is he was made for the 3.75 scale Green Lantern Movie line. While he stands nicely next to your Super Powers and JLU figures at a matching height, in terms of physical proportion, he just seems dainty. The other problem is he just doesn't look like Salaak. While Mattel did a bang up job of making Salaak look accurate to the film, film Salaak and comic Salaak just don't look the same. Stumbling by accident on the Minimates Salaak while perusing Ebay, I noticed he had a very nicely sculpted head, which seemed to be in proper scale to a 4.5 figure. While most Minimates appear to use the same generic body with a different paint job, this particular figure had a beautifully sculpted head and torso. I watched Ebay for a few weeks until I was able to find a Salaak Minimate figure at a decent price (not being particularly fond of Minimates as collectibles, I'm certainly not going to pay collectible prices) as well as another Salaak movie figure for cheap. Once I had both, I used the boil and pop method to pop the arms off of my Salaak movie figure. The Minimates figures are designed to be taken apart and reassembled, so you can get a real feeling for the geometry of them. After looking at the two figures for a while, trying to figure out how to best combine them, finally I grabbed my hacksaw and cut off movie Salaak's torso just above the bottom arm hole. Then I cut out the plastic at the middle and back of the arm hole, plus all the plastic behind it at a right angle, so that the plastic left at the front of the torso from what had been an arm socket now formed a peg. I also sanded this down a bit with a Dremel tool to fit the peg hole in the Minimates torso. It fit snugly. This gave me an idea how the two parts would fit together. Once plugged in, I could see how much the bigger figure's torso stuck out in the back as opposed to the Minimates torso, so I popped the Minimates torso back off, cut off the excess with the hacksaw, and sanded everything to look flush with the Dremel tool. That left the arms. I'd considered putting the Minimate hands on the movie figure arms so it could grip, but I decided against that as the Minimate figure's fingers looked too short and stubby. I fully disassembled the Minimate and used my hacksaw to cut off the arm pegs off of the main torso, then sanded that smooth. Then I used my power drill to drill new arm holes in the torso body that was left, with holes that were just big enough to snugly fit the pegs on the movie figure arms. Once that was done, I slid the outer torso back on over the inner torso, then pegged the Minimate head back in to hold it together. Then I slid the Minimate torso back onto the peg made in the movie figure body, and pushed the movie figure arms into the Minimate torso. Gravity held everything together, and I could already get a feeling for how the figure would look. Although there was a noticeable unevenness where the torsos joined, the figure already looked pretty good. I also modified the legs slightly to differenciate this Salaak from the movie version of the figure, using nail clippers to take off the bumps on the back of his calves and butt, and then sanding those areas smooth. I did this so the two finished figures won't look too similar, so that when I line up all my Green Lantern Corps figures, I can use both, my Salaak as Salaak, and the movie figure as one of the many generic unnamed alien Lantern officers. Nearly there. So I picked up some Magic Sculpt resin clay, and deciding not to take any chances, mixed resin dye into the clay as I mixed it, so it would dry already black and not necessarily need painting later. That actually ended up being pretty helpful later on when it came to painting, since I didn't have to get in too close to non-black areas and risk getting black paint on them. Anyway, first, I fully disassembled the figure one last time, coated the arm joints with clay to make them as snug as possible in the holes, trimmed off the excess clay, then used a nail to push out the arms from the hole on the opposite side (the arm holes from left to right go all the way through and connect). Then I left the arms to dry and harden. Then I fully reassembled the figure except the arms. The next step was to work clay into the area on the sides of the Minimate torso where the outer torso was over the inner torso, as the Minimate figure had left a gap there to allow for better movement of the Minimate arms. With the new arms, that leaves that much less plastic for the little arm pegs to grip, so you're really going to want to fill that in. It looks better anyway. Once I filled in the gap evenly, I poked into the four holes with a nail, so that I'd remember where they were, and also to have a starter hole for drilling later. The last part was to wrap clay around the lower torso to make the two torsos appear to be seamless in their joining, giving a smoothed, cury, organic kind of look, as opposed to the block on a stick look it had naturally. I took time on this and slowly worked on it to insure the best possible curving and natural look I could do. With all that done, I let it sit for an hour or two and let the clay dry and harden. Once the resin was solid, I went back in with my power drill, using the same drill bit as before, and drilled out the resin over the original arm holes. The arms fit in snugly at this point. In terms of physical body, Salaak was done. All that left was painting, and I'm not going to get too into that, since everyone knows how to paint. I will say that a quick Google image search reveals that no two artists draw Salaak the same, even to the point of wildly different costumes from appearance to appearance, so I was left with a lot of leeway in how I wanted him to look. To be brief, I'll say that I used masking tape to get smooth boot lines, and I boiled and popped the legs off to paint the crotch best, although that led to problems later on when I wanted to reattach them (I eventually got around this by using wire trimmers to chop off the excess from the pegs, making them easier to shove back in the sockets). I painted him with enamel paints and sprayed him with dullcote when I was done. I have no complaints. To sum up, I'm really happy with how my very first custom figure that isn't just a simple repaint came out. This is one of those cases where he's truly more than the sum of his parts, as neither of the two original figures he's made from were honestly all that impressive or comic-accurate. This figure looks really nice lined up to my Hal Jordan Super Powers and assorted JLU Green Lantern figures. I did put some effort into trying to get his scale right. There's only one good looking Salaak figure out there, a DC Direct figure which is amazingly SHORTER than the human Green Lantern figures they've put out. That's just not right. A quick search reveals Salaak is supposed to be 7'6, a mere two inches shorter than Kilowog. I base my figures' looks and scale around Kenner's Super Powers line, as it was the first great Superhero line, and the standard around most subsequent superhero lines and Kenner lines in general were based. Not to mention that it had Jack Kirby's fingerprints all over it, which is reason enough to deem it superior to all others. It being a 4.5 inch figure line, and the average height for most heroes being 6 feet tall, with a little quick division and multiplication on your trusty calculator, you can quickly determine that a Salaak figure should be about 5.625 inches to match the scale. This one does. Pictured next to Super Powers Hal Jordan and Green Lantern Movie Salaak for comparison. This is NOT a statue, it retains full posability. I've also since learned that rather than using resin clay on the arm pegs to fit them into the arm holes snugly, using a hot glue gun to squirt a tiny amount of hot glue into the arm holes, then immediately shoving in the arm pegs and continuing to rotate the arms as the glue cools and hardens, really does a superior job of locking in the arms while still allowing for rotation and movement. This has the added advantages of: A. Superior tightness in the joints, keeping the arms better held in, and better posability, B. Nearly instantaneous, as opposed to waiting for resin clay to dry, C. Hot glue sticks are considerably cheaper than resin clay.  |
| The Joker |  | Submission Order |  | Amora the Enchantress |
| Deathstroke | | Super Powers Series | | 1984 Superpowers Gold Superman |
| None | | Created by The Virgin Prince | | Green Lantern Soranik Natu |

 Update Your Custom
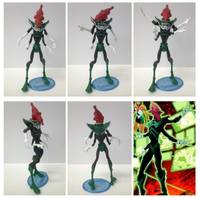