 | Hello Guest - Sign In or New Account |
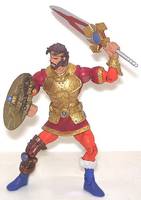
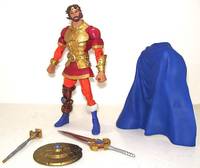
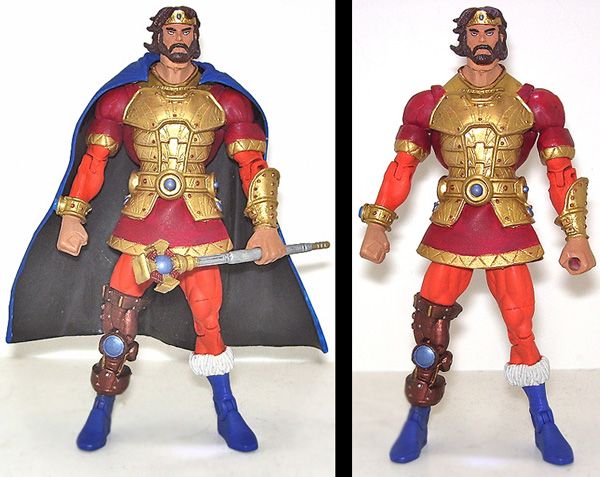
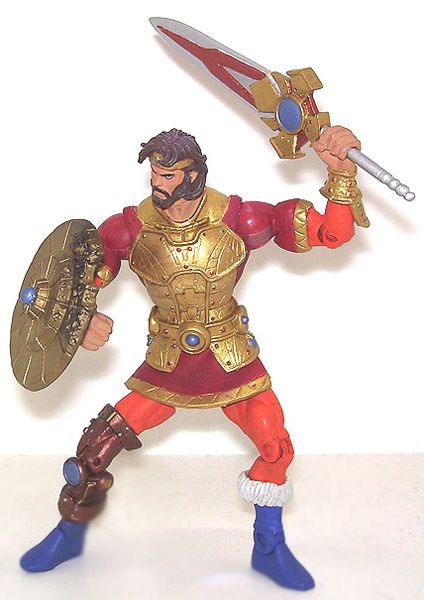
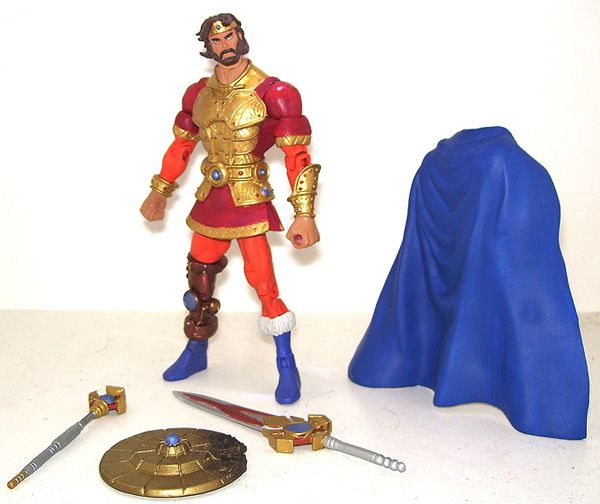
Hey, figure freaks! So, fun story, I was working on a custom project in early July, slipped with my knife, and nearly cut off my left middle finger. Know what stopped the blade? BONE. Yeah, I cut ALL THE WAY TO THE BONE. Seriously. So, anyone wondering why I've not been posting figures for two months . . . that's HALF the reason. The other half? Well, I've been working on more figures! What, you thought a near-disfiguring injury was going to stop me? Pfft! Anyway, I know I've been somewhat absent from the front page of the custom showcase for a while, but that under NO circumstances mean's I've been idle! In fact, as a few of you know, I've been plugging away at some really great pieces for your enjoyment, and now I'm going to let you have a peek at the fruits of my toils over the last two months. Who's today's star? The champion of The Great Unrest, leader of the Masters of the Universe, and King of all Eternia, Randor! MOTU Hybrid is my attempt to unify the best of all three MOTU eras. The ideas (i.e. color schemes and concepts) of the original cartoon, the sculpts of the 2002 toys, and the articulation of modern figures, at a far more reasonable cost. It's an awesome and ambitious project, but not always an easy one. And Randor is a prime example of the challenges that can sometimes arise in the process. Like my other most recent MOTU Hybrid project, Randor started life as a mini-statue. No joints, just a thick mass of material. Unlike previous mini-statues however, Randor is NOT made of soft rubber resin. Nope, he's a solid chunk of the hard, cold-cast stuff, sculpted on a metal frame. Not only is he hard and heavy, but he becomes brittle when you hollow him out, and his resin becomes a fine powdery dust that gets EVERYWHERE. The guy is the definition of "difficult to work with." Fortunately, my experience with the previous mini-statues (especially Clawful and Hordak) prepared me for this challenge, and I knew several dos and don'ts for the new project. First, under no circumstances was I going to attempt to salvage Randor's "skirt" like I did with Clawful. Just too difficult a process. Better to make one from scratch. Second, if the limbs are fairly bland, you don't need to keep them, they can be replaced in their entirety, like I did with Hordak. And lastly, always try to use joints cast in the color you want them to be in the finished product. In Randor's case, his shoulders were going to be red, so I needed to track down a good, muscular, red superhero figure. I ended up with a DCUC Orion, which was doubly useful thanks to the blue boots, the same shade as Randor's shoes. I removed the statue's head, arms and entire lower body. I hollowed out the shoulders and the waist armor. I took the hands from the original arms (complete with bracers) and replaced the hands on the Orion arms, then resculpted the tunic sleeves below the shoulders and attached the arms and head to the statue body. The legs were a more challenging matter. Randor's left leg was easy enough, I just had to sculpt a fur cuff around the top of the boot. His right leg was more problematic, since the king suffers from an old knee injury and is thus forced to wear a complex mechanical leg brace. I carefully cut the brace off the statue's leg, hollowed it out, split it in two, and spliced it onto the Orion leg. It wasn't a perfect fit (the brace knee joint is a little lower than the left leg knee), but it's fully functional and it looks awesome. As for the skirt, I fashioned a new one out of craft foam sheeting, carefully cutting the zig-zag trim pattern into the bottom edge without cutting all the way through. Minor touch-up sculpting and a full paint job, and He-Man's dad is complete! King Randor has four accessories: 1 Sword - came with the statue, full repaint 1 Scepter - came with the 2002 Prince Adam, full repaint 1 Shield - melted by a vial of acid thrown by his brother Keldor, deflected onto Keldor's own face, turning him into Skeletor! The shield came with the statue and connected via a LONG peg sticking off Randor's bracelet. I he looked silly with a foot-long rod jutting out of his arm, so I replaced it with a small Lego stud. Now it looks like a large gem on his wrist. 1 cape - made from a ML Moon Knight cloak, removed the hood, filled in the back peg-hole, and painted the outside blue. Many thanks to GOLIATH_CUSTOMS for the piece! One more figure until I complete the whole Eternian Royal Family! Queen Marlena may just be my next project! By the power of Grayskull!  |
| Ram Man (MOTU Hybrid) |  | Submission Order |  | Young Avengers Hulkling and Wiccan |
| Ram Man (MOTU Hybrid) | | Masters of the Universe Series | | Lava loc |
| Ram Man (MOTU Hybrid) | | Created by Batman1016 | | Fisto (MOTU Hybrid) |


 Update Your Custom
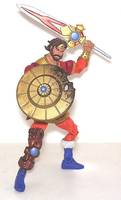
This Randor is a pretty cool-looking piece, especially for a character I've never thought of as a badass in any way. The construction of it is really crazy and I can't imagine working with the material the statue was made of. It all comes together really well and I love the look of the head and that shield onto an articulated body. Nice job.
. . . Yeah, right.
Anyway, thanks so much for commenting, and keep checking back!
It's great to see you back! This is one AMAZING custom! Much respect for the amount of work you poured into this masterpiece!!!
Seriously, I was reading a figure review of this statue some months ago, and it said unlike the softer mini-statues, no one was going to be able to articulate this figure due to the hard resin. And I said, "Challenge accepted." So there!
Thanks for checking him out!
Second . . . scared? Hey, if it's the finger thing, relax, this wasn't the toy I cut myself on! That figure is a post for another day.
As for tips I can give you? Hmmm . . .
1) The cape he comes with is worthless. It's so rigid and heavy, and bent in such an odd shape, even if you could find a way to put it back on him when you're done, you couldn't put him in any poses other than his original stance. Ditch it and forget it.
2) There's really no way to salvage the limbs either. With the exception of the bracelets and hands, and the right leg support, just replace them entirely.
3) You can just forget knives. You aren't cutting this thing with anything short of a power tool. Use a Dremel with a cutting wheel. And I snapped about five of the damn things before giving up on the basic ones that come standard with your kit. Get yourself a reinforced cutting wheel for this project, one with the grid inlay pattern on the back. The thinnest one available, since there are some tight spaces you have to cut through without damaging the surrounding sculpt, like the back of the mechanical knee.
4) The metal armature frame is surprisingly thin and easy to cut. Just make sure you're wearing goggles, because you don't want to be caught off guard when you're cutting through his leg and sparks start shooting into your face as you grind through the wire. If you wear glasses, that should be all the protection you need. And of course, don't have anything flammable nearby (should go without saying, but safety first).
5) The resin this thing is made of is absurdly heat conductive! I'm used to working with plastic or rubber, and that stuff is insulatory. This stuff is NOT. You can be grinding out one end of a limb or the torso, and holding it at the other end, and still burn your fingertips. Probably want to wear some kind of gloves, or at least have water on hand to dip any pieces that get too hot. Or to dip your singed digits!
6) Drop-cloth couldn't hurt. That powder gets EVERYWHERE. Anything in a five foot radius you don't want coated in white dust, cover it up. Especially if you work anywhere near your computer.
7) Particularly the left bracer where it wraps around the forearm? I had to grind that out and make that armor plate REALLY thin. Like, 1/8 - 1/16 inch or so. This stuff gets SUPER brittle when it's that thin, so be careful and don't get frustrated. Yes, it WILL crack and chip on you. Just keep the pieces, glue them together when your finished hollowing them out, resculpt any tiny details you destroy, and just be patient.
Beyond that, nothing you haven't done before on your previous MOTU customs. Just joint splicing and limb replacement. Good luck!